Introduction
Using materials from an Edu Science Deluxe Scientist Kit, I will build my own galvanometer to detect electrical current in my upcoming Faraday experiment.
Objective
To make a galvanometer, which is an electromechanical instrument that detects, measures, and determines the direction of small amounts of electrical current.
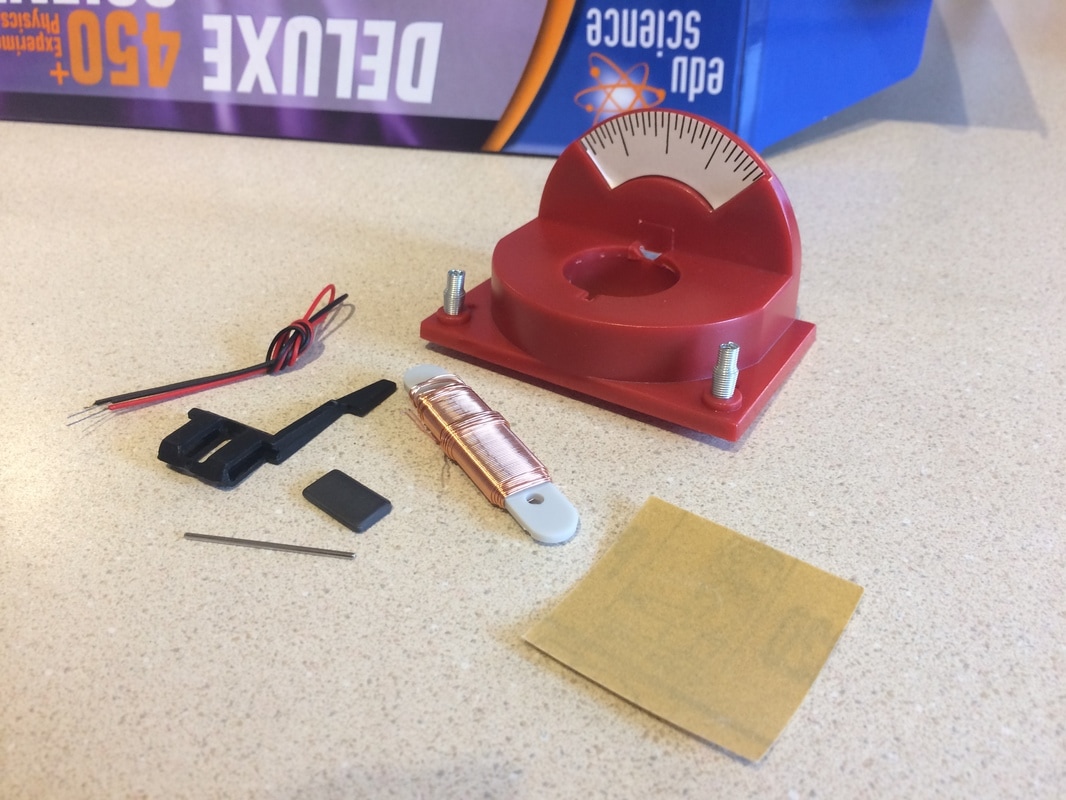
Materials
This project came with the following materials:
- A magnet
- A pin
- Enameled wire
- A pointer
- Sandpaper
- 2 springs for connections
- Scale label
- 2 wires
Procedure
- Slip the magnet into the magnet holder of the pointer.
- Take the pin and push it through the holder so that it rests on top of the magnet and protrudes equally on both sides of the holder. Your pointer is now ready. Put it aside until you are ready to use it.
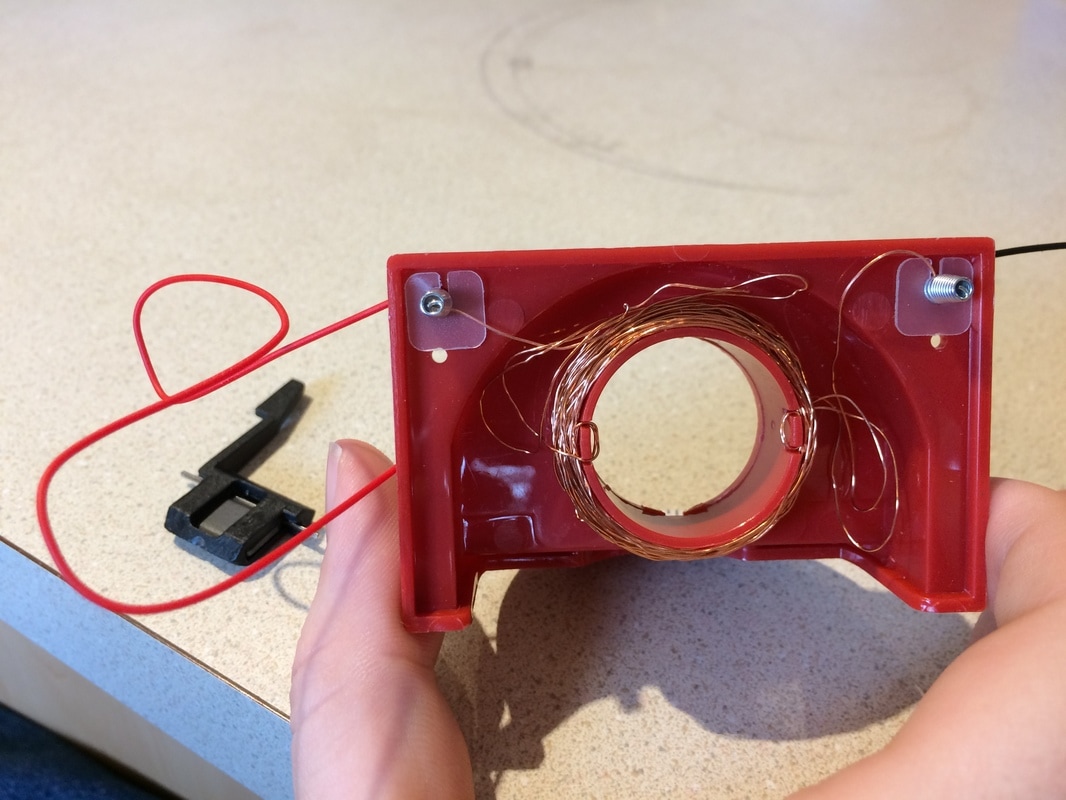
- Turn the base over; you will see the core of the coil. There are two short slits, one on each side of the core.
- Unwind the first 6 inches (15 cm) of wire from the coil and wrap it around one of the slits twice. Push the end of the wire out of the way, into the middle of the coil.
- Slowly start wrapping the wire around the core. It does not make a difference if the wires overlap, however, do make sure that the wire does not go over the 6 stops at the bottom of the core. Keep winding until you've used all the wire, except the last 6 inches (15 cm) and wrap that tightly around the remaining slit. You should now have two ends of wire free.
- With sandpaper, clean the enamel insulation off the end of each wire.
- Take the 2 ends of the free wire and slip each wire under the bottom of a spring. Make sure you attach them securely to the springs.
- Turn the base right side up. Take one connecting wire and slip one of its ends into the spring. Repeat the same procedure with the other connecting wire on the remaining spring.
- Stick the prepared label onto the base.
- Take your pointer with the magnet and place it into the base. Make sure the wire on the core does not disturb the needle from functioning. If it does, press the wire slightly with a pencil.
- Make sure that the magnet holder does not touch any of the sides of the base. To check this, give a slight push to the pointer with your finger and see that it returns to the upright position, pointing to the 0. The scale has the 0 in the middle.
- My pointer refused to point to the exact middle (see photo).
Luckily, this didn't negatively affect my experiment. - Using the two connecting wires, connect each end of a battery to the system, creating a closed circuit. Observe the pointer. Depending which way you connect the current, the pointer will point either to the left or to the right, indicating the flow of electricity, either to + (plus) or to - (minus). Switch polarities.

Conclusion
After lots of trial and error, I was finally able to correctly wrap all my wire around the core correctly. It's easier said than done! Below is a video of my results.
As you can see in the video, when I connected the positive terminal to the right side, the galvanometer pointed to the right. When I flipped polarities and connected the positive terminal to the left side, the galvanometer pointed to the left.
As you can see in the video, when I connected the positive terminal to the right side, the galvanometer pointed to the right. When I flipped polarities and connected the positive terminal to the left side, the galvanometer pointed to the left.
